Showing posts with label DIY. Show all posts

Monday, October 22, 2012

Make a wish!

Everyone's made a wish on a dandelion before but how about having the opportunity to make a million wishes from one dandelion? A dandelion their nails? I tried to create a nail design that would mimic this action. Hope you like it! :)
Say, what nail polish is this?
Gray-OPI's French Quarter For Your Thoughts
Mint- Sally Hansen's Mint Sorbet


With Love,
         Christine

Friday, October 12, 2012

Green Fingers

No, not a green thumb.
Have you ever gotten green fingers from the rings you buy for $2 a pop?
Well, have no fear and make that green disappear!
Just lather some clear top coat on the ring, let it dry, and you're done!
*TIP* Stick to doing one thin coat! A thick coat takes longer to dry and might make your ring go from size 7 to a size 6! ;)


With Love,
        Christine

Tuesday, August 7, 2012

USA nails

My eyes have been glued to the screen watching team USA in the Olympics this entire week. Among my favorite athletes are Missy Franklin, Gabby Douglas, and of course Michael Phelps; Congrats to all! I have to say though, I noticed all the women in swimming had their country's flag painted on their nails. So in order to support the U.S. Olympic team, I made this nail diy so that you can support team USA as well! :D
A picture is worth a thousand words so I thought it would save some time explaining the process. :P
What I used:
Tape
Stars(you can find these on Ebay)
*Toothpicks and water (easy application of the stars) 
   Dip one end of the toothpick into the water and pick up a star, apply the star to the nail and use the dry end of the pick to push and position the star into place.
Red: The Thrill of Brazil by OPI
White: Chill by Maybelline 
Blue: Russian Navy by OPI
Top Coat (seals the stars so they don't fall off!)


With Love, 
        Christine

Friday, June 1, 2012

Glittered Nails

You don't have to always do a crazy design on your nails. Take a break and do something simple. You wouldn't want all your creative juices gone after a couple of nail designs!

I painted my nails with two coats of from For Audrey from China Glaze and then I put Spot Light from NYX Girls over it. Make sure the glitter is spread out and don't pile on too much of the glitter. You want them to notice the color too! Also, take it easy with the glitter because it takes forever to clean them off your nails.
With Love,       
          Christine

Wednesday, May 2, 2012

The Chain Cage

I think the whole obsession with chains is understandable, they make everything a little more edgy. I share this infatuation as well. I also adore the bracelet connected rings, so I added these two loves of mine to create a cool chain "cage" for my hand.
What it looks like! :D

You will need:
7 jump rings
Chain
Wire cutter
Lobster Clasp

1. You don't want the bracelet to be loose or it will look droopy.
For the bracelet, I cut about 6.5 inches of chain. Open two jump rings and put them on either end of the chain. Connect a lobster clasp to one jump ring. Close both of the jump rings.

2. Find the middle of the chain and connect a jump ring.
3. Cut chains for the ring part. Connect a jump ring and put both ends in to create a loop.
You could also just wear a chain ring with another ring on top so that it doesn't fall off.
4. Depending on how tight you want the "cage," lengths will vary but my measurements from the wrist to the fingers in inches were 3.5, 3, 3.25, 3.25. This is from the pinky to the wrist, ring finger to the wrist...etc. Connect the chain rings to the chains.

5. The hardest part. Going back to the jump ring in the middle, slide all the chains into the loop in order. There will be some adjusting.


YOU'RE DONE. whew.


With Love,
         Christine

Friday, April 13, 2012

Yellow Diamonds in the Light

Ah, Rihanna has some catchy songs but I was talking about bracelets!
If you have any bracelets with crystal diamonds and looking for a good DIY, you've found it. Sometimes, these bracelets can look too cold and harsh and you need to liven it up with color. This DIY is super easy and inexpensive. All you need are the diamond bracelets that you already have and a sharpie.
I chose to make a yellow and a green one. Just color in the diamonds with sharpie and voila, you have new bracelets. Renovating what you already have in your closet is fun, fashion forward, fast, and free of charge. ;)
Before.
Simply color in the crystal diamonds in with you sharpie of choice. You may need multiple coats
Green, my favorite color!

After.


With Love,
         Christine


Monday, April 9, 2012

Cuckoo for Coconuts.


I found myself in a coconutty situation over the weekend. I had a fresh coconut but I didn't know what to do with it. Luckily, my uncle was there to help me out.
I could hear "ping" sounds as the knife bounced off the hard shell. After a few attempts, the shell finally cracked it in half and everyone watch as the sweet coconut juice flowed into a bowl. Yum.
We now had to find the coconut shredder to get to the flesh of the coconut. We couldn't find it. So, we used the metal cap off of one of those old fashioned pop bottles to scrape the inside.
It was meticulous work, I must say. The reward, however was well worth it. Fresh shredded coconut to go on top of our vanilla ice cream.
Plus, I was going to scrape the flesh from the shell completely and make a bowl but my parents threw the shell away. So, I guess that would be another project for another time.


With Love,
         Christine

Monday, February 20, 2012

Bejeweled Turban

Moroccan Princess? No, just another stylish girl who knows how to wear a turban. Up your look by adding a bejeweled ring to your basic turban look. All you need is a silk square scarf and awesome rings. This is fun, hip, and really easy to do. Achieve this turban in less than 2 minutes! Stay tuned to sew your own fabric turban.

With Love,
        Christine

Wednesday, February 15, 2012

Closet Knob Updated

I've been trying to find ways to fix up my room without using a lot of money to do so. I went to Michael's to get some art supplies one day and I came across this cute crystal knob for $2. It was perfect because I've been wanting to replace my old gold knob from the...1980's. It was a sweet find, considering the ones from Anthropologie are three times the price I paid at $6. Replacing the old knob was fine until I realized the screw they gave me was too short. I ended up using the old screw but it was too long; meaning the knob would not be tight enough. Ah, but I found a solution! I put on a couple hex nuts left over from another project to the end to "shorten" the screw. And now, my closet looks updated to this century.
Before
After

With Love,
Christine

Tuesday, January 24, 2012

Triangle Flip Tips

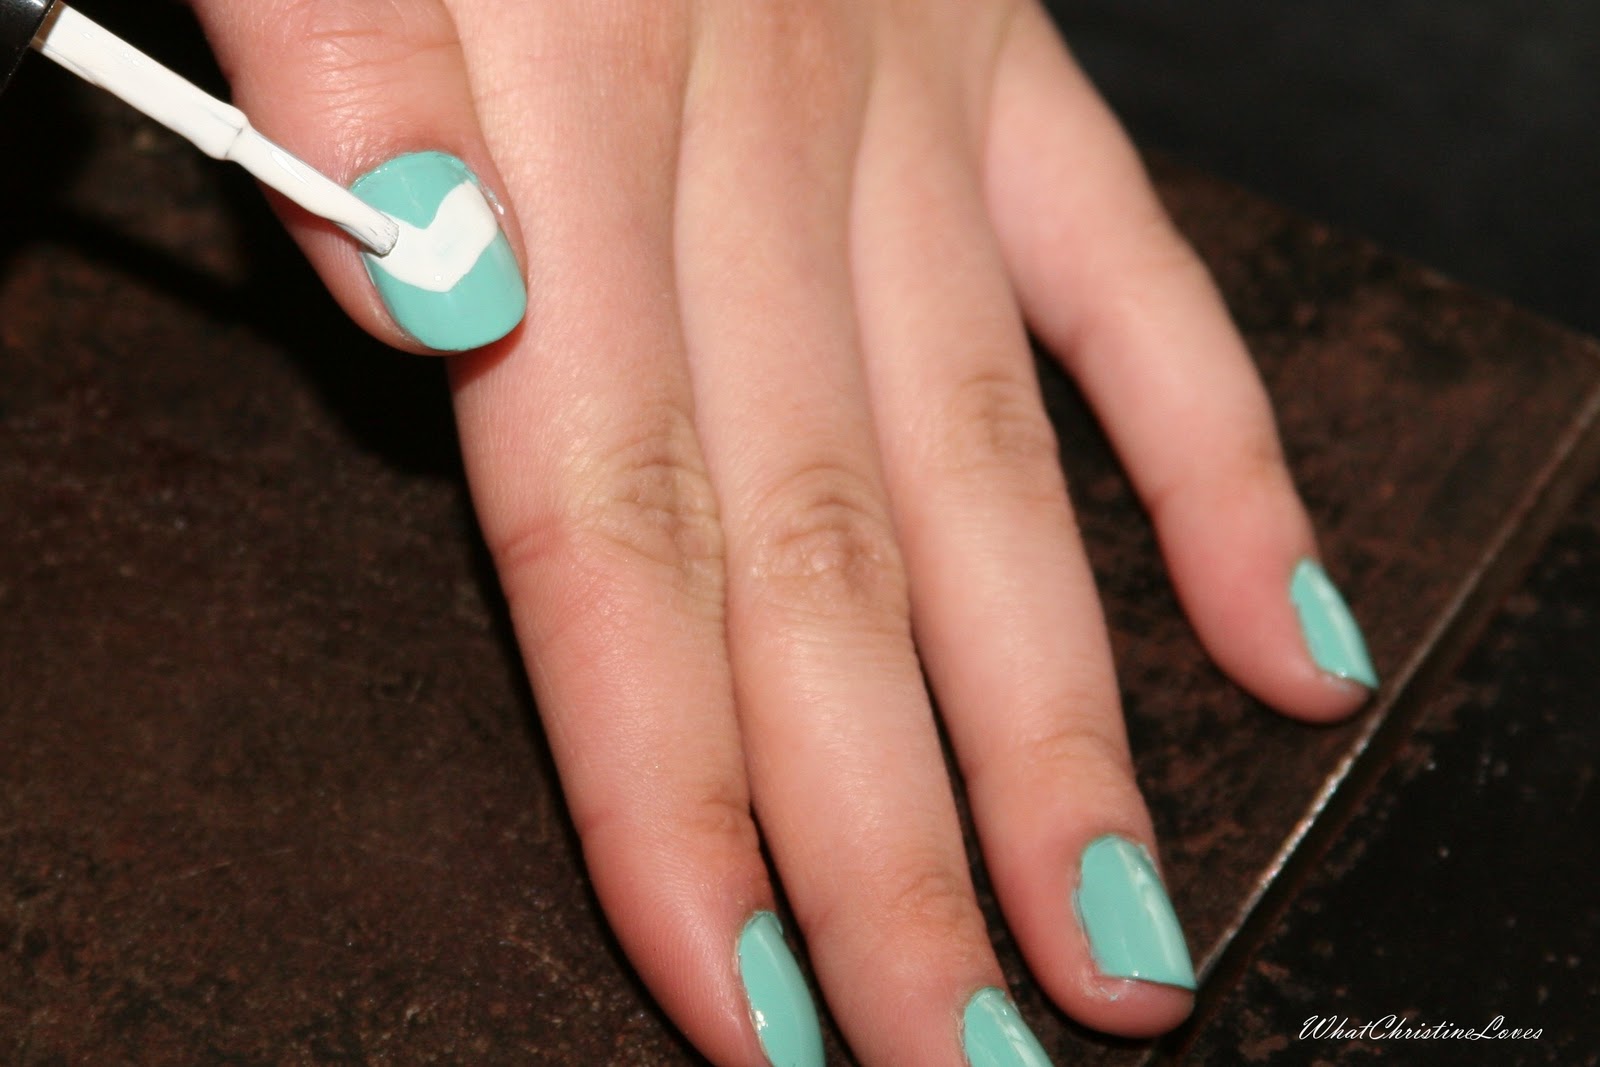
I have a secret obsession with triangles, and it's not solving for their areas! I think they're fun and simple, they can also make a huge statement. When doing nail designs, I prefer putting light colors on top of a darker base because when viewing the nails from a distance, it isn't as overwhelming as dark on light. We have all seen the inverse french or "moon" manicure, now to put my obsession for triangles into the mix! Scroll down for steps for this nail design.
1. Paint your nail with a medium to dark polish as the base.
2. For the thumb: use a white polish, place the brush onto the center of the nail and drag up towards the base and end at the side. Finish by drawing V's with a thin nail art polish, on top and bottom of the large V you just drew.
3. For the others: use the thin nail art polish, place the brush onto the center of the nail and drag the brush towards the base of the nail. End your stroke where the cuticles end on either side. Fill in this V shape with the white polish to create a triangle. Follow the lines of the triangle with the thin nail art polish on either side of the triangle until the strokes meet.
4. Clean the skin around your nail with polish remover if you need to.

With Love,       
         Christine

Tuesday, January 10, 2012

Marie Antoinette

We have all heard that famous line, "Let them eat cake."I remember watching the movie, Marie Antoinette a few years ago. Everything she did, she did extravagantly. Not only did Marie have a luxurious lifestyle, she had expensive taste as well. She had an endless supply of little petit fours (while her country starved) and drank champagne like it was water. A particular scene I remember was when she drank a glass of champagne and dropped small berries in her flute. I thought that was simple, fun, and worthy of trying.
Of course, I am only sixteen, so I used apple cider instead. Feel free to use alcohol if you are of age. :)
It's really easy; put your choice of berries or fruit in your flute and fill it up with cider/champagne.
The best part is eating the berries after you finish drinking, because they soaked up all the flavor while they're sitting in the drink. It's a party in your mouth! Plus, this is great for parties.


With Love,
         Christine

Wednesday, November 23, 2011

Photo Fun.

Have you found taking pictures a little boring lately? Well, don't fret my friend, this is the most fun you will get by making frames for your lens. 
Supplies:
  • Camera with lens
  • Construction paper
  • Small Scissors/Exacto Knife
  • Pencil/pen
  • Tape
Steps:
1. Trace the circumference of your lens onto construction paper.
2. Cut it out.
3. Draw a shape onto the middle of your circle about 1x2 cm and cut it out.
4. Tape your new frame onto your lens and take pictures!
My finished frame, j'adore?
I used tiny scissors, remember to cut a really small shape!

I love junk food, it hates me. Love/Hate relationship much?

I love chocolate pudding.


With Love,
          Christine


Wednesday, November 2, 2011

Cotton Candied.

When it comes to my nails, I want them to be unique. I decided to combine contrast colors, by doing this, they make each other stand out more visually. The pink really pops out against the blue! The colors I used for this cotton candy look were Sweet Memories from OPI and For Audrey from China Glaze. Painting one finger out of the five a different color automatically bring your eyes to that one digit. I chose to paint my ring finger pink because it draws more attention to the rings I wear!


With Love,
        Christine